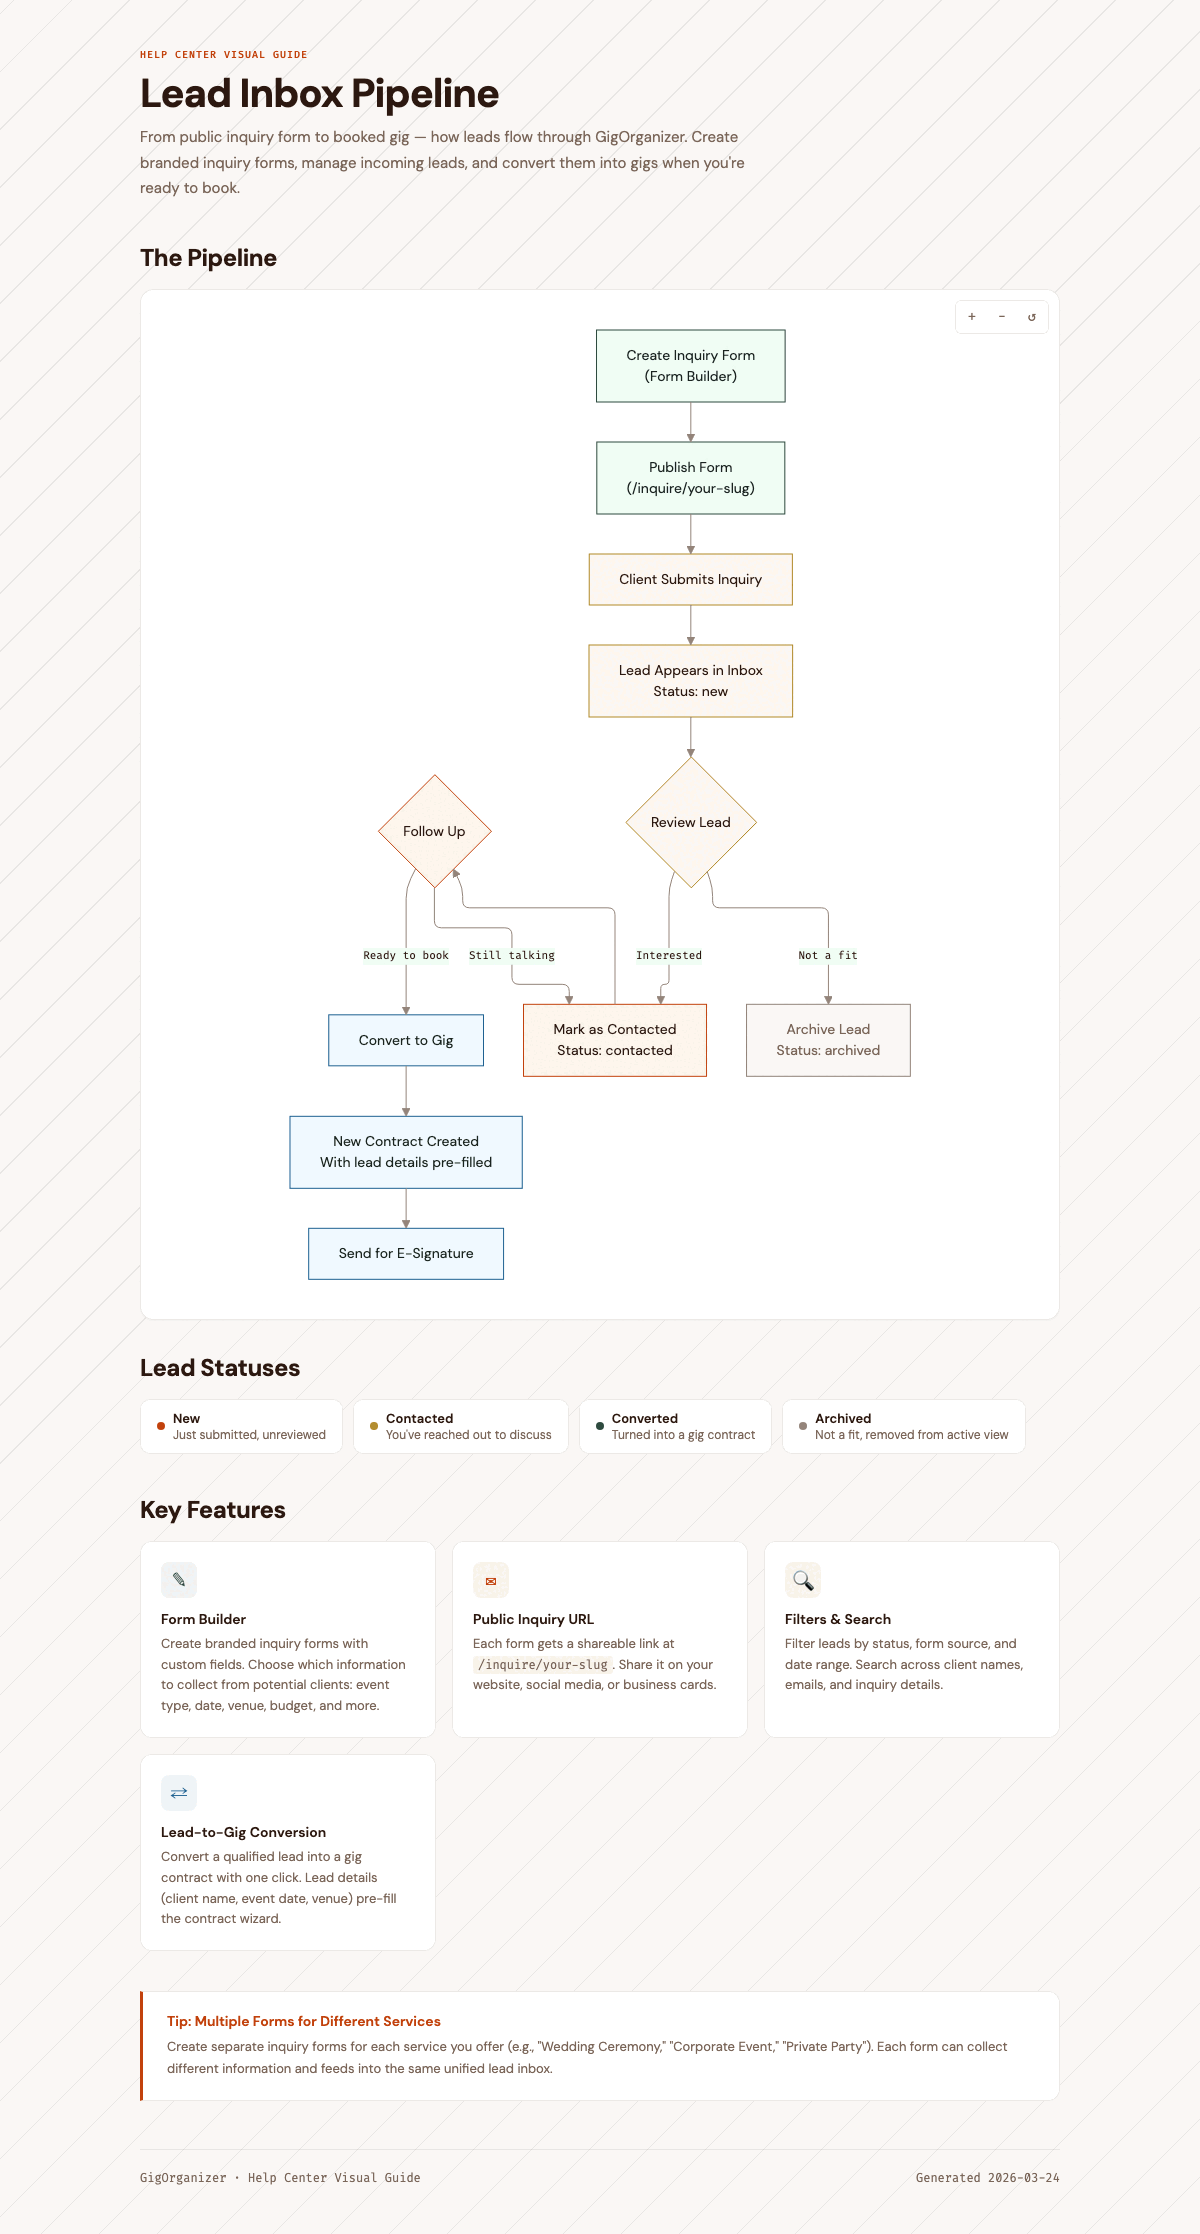
Capture client inquiries with branded lead forms, then manage them in a centralized Leads area. A form can live on your GigOrganizer public profile, be embedded on your own website, or be shared as a direct booking link.
Creating an Inquiry Form
- Go to Dashboard > Leads > Forms
- Click "+ New Form" (or "Create Your First Form" if you have none)
- Choose a Performer Identity — this name appears on the public form
- Set a Form Name (e.g., "Wedding Inquiries")
- Click Create Form
Each form gets a unique public URL like gigorganizer.com/inquire/your-slug.
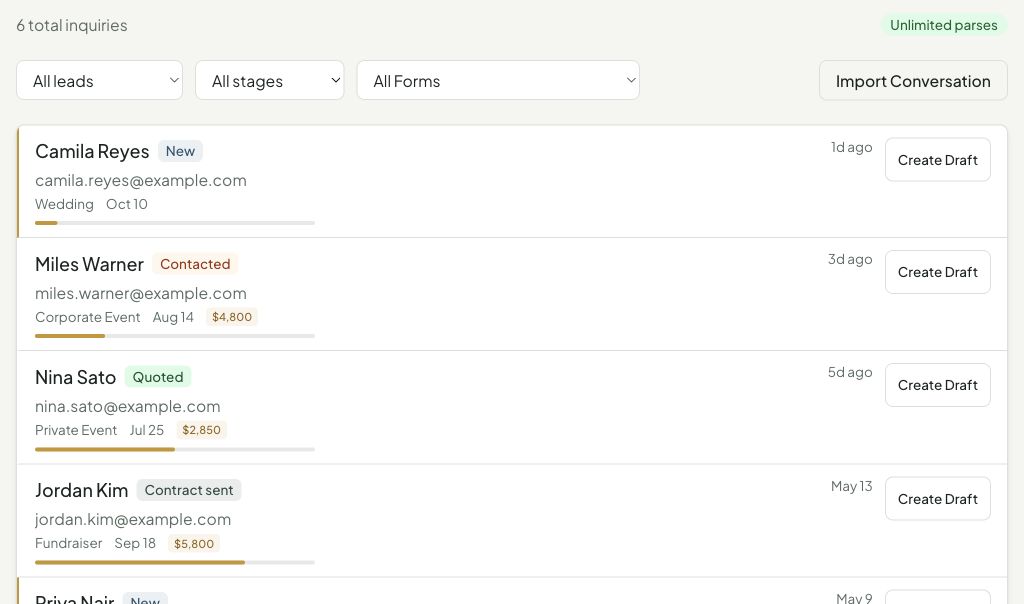
Leads Area Tour
Go to Dashboard > Leads to manage new inquiries. The Leads area has tabs for:
| Tab | Use It For |
|---|---|
| Inbox | Review leads, filter by stage or form, and open lead detail |
| Forms | Create and manage inquiry forms |
| Analytics | Track lead volume and conversion patterns |
| Settings | Configure lead inbox behavior and forwarding |
The inbox starts with your forwarding address for email-based leads, then shows total inquiries, stage filters, form filters, and the Import Conversation action.
Lifecycle Stages
Leads use booking lifecycle stages so you can tell where each inquiry sits:
| Stage | Meaning |
|---|---|
| New | Just arrived and has not been worked yet |
| Contacted | You have acknowledged or replied to the client |
| Quoted | Pricing or availability has been discussed |
| Contract sent | A draft or contract has been promoted toward booking |
| Booked | The inquiry has become a confirmed gig |
| Lost | The lead is no longer active |
Use the view, stage, and form filters to focus on leads that need your attention.
Lead Detail
Click any lead to open its detail view. The detail view includes:
- Contact information, event date, venue, guest count, budget, and selected form
- A lifecycle progress row
- Possible match cards for existing gigs or contacts
- Event preparation fields you can capture before promotion
- Quote fields, deposit fields, client message, special requests, referral source, and private notes
- Communications tools for pasted emails, forwarded conversations, and lead follow-up
- Actions to create or promote a contract when the booking is ready
Editing Your Form
Click Edit on any form card to open the form editor. You can configure:
| Section | What You Can Change |
|---|---|
| Basics | Form name, performer identity, multi-performer mode |
| Fields | Toggle and reorder fields (name and email are always required) |
| Event Types | Customize the event type dropdown options |
| Appearance | Accent color, background, button text, corner style, custom font, logo (Pro) |
| Auto-Response | Custom subject and body for the confirmation email sent to leads |
| Embed Codes | Copy iframe or JS snippet for your website |
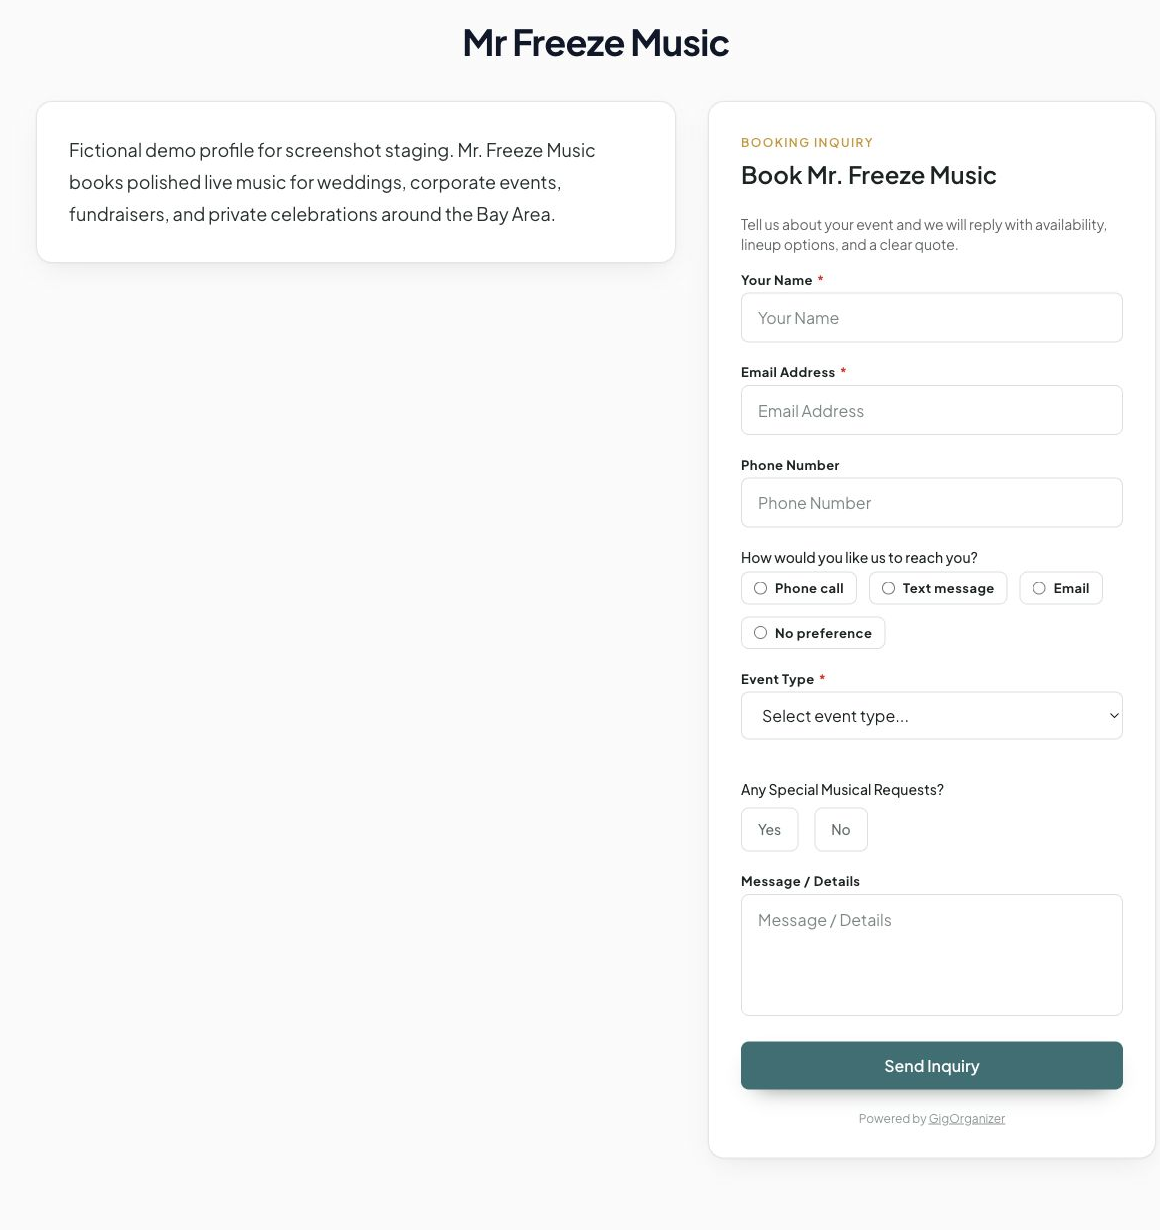
Available Fields
Name, email, phone, event type, event date, event time, venue, guest count, budget, referral source, special requests, and message. Each field can be toggled on/off and set as required or optional.
Publishing Your Form
From the form card overflow menu or the editor's Embed section, copy one of:
- Direct link — Share
gigorganizer.com/inquire/your-sluganywhere - iframe embed — Paste into your website HTML for an inline form (add
?embed=truefor a clean, no-header version) - JS snippet — Lightweight script tag for seamless integration
You can also attach a form to a GigOrganizer public profile directly from the form card. Click Attach to public page (or Public page links when the form is already connected), then choose the performer public page that should use that form. If you need to edit the page itself, use the Public Profile link to open Dashboard > Performer Settings.
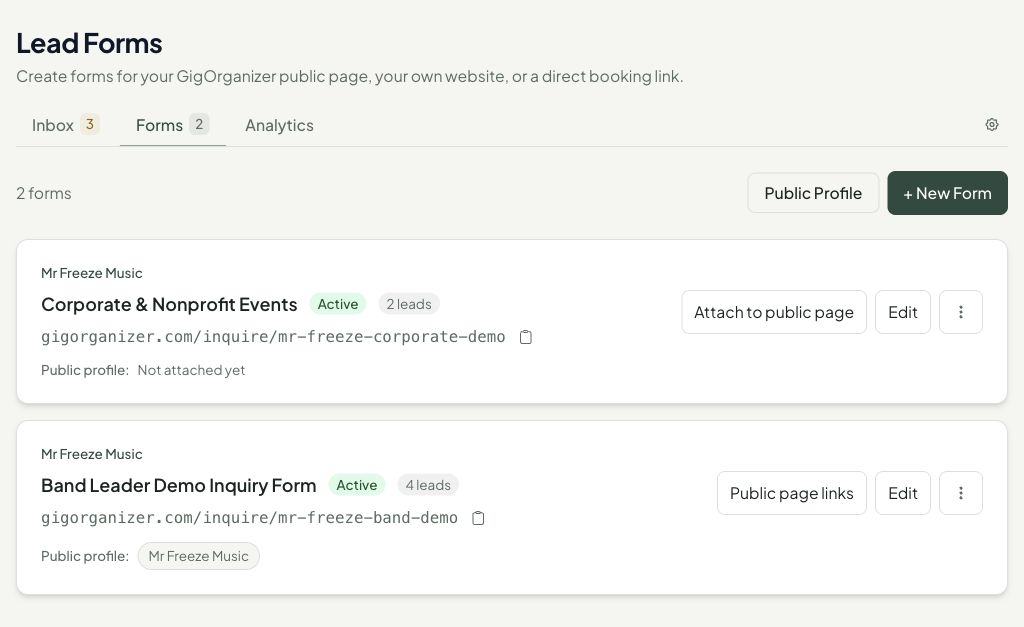
Public Profile Forms
When a public performer profile is published, its booking inquiry section can use one of your lead forms. You can connect the form from either the public profile settings or the Lead Forms card. Submissions from the public profile land in the same Lead Inbox as embedded forms and direct links.
Activating and Deactivating Forms
From the form card overflow menu, click Deactivate to stop accepting submissions without deleting the form. Deactivated forms show an "Inactive" badge. Reactivate anytime.
Common Questions
Can I have multiple forms?
Yes. Create separate forms for different performer identities, event types, or websites.
What happens when a lead submits the form?
They see a thank-you message (customizable). If you've configured an auto-response, they also receive a confirmation email. The lead appears in your inbox immediately.
Is the public form page indexed by search engines?
No. Inquiry form pages include a noindex robots directive.